Planning a trip? Our complete Vietnam e-Visa guide covers the official 2026 application steps, processing times, fees, and mistakes that cause rejections.(CLICK HERE)
Table of Contents
Applying for a Vietnam e-Visa is straightforward once you know the process. But small mistakes, a blurry photo, a mismatched name, applying too late, delay a lot of travelers and cause unnecessary stress before a trip.
This Vietnam e-Visa Guide walks you through the entire process step by step. What you need, how to apply, how long it takes, and the mistakes that trip people up most often.
Vietnam e-Visa Guide: Everything You Need to Know Before Applying
Who needs an e-Visa: As of 2026, citizens of all countries and territories are eligible to apply for a Vietnam e-Visa. A small number of nationalities have separate visa exemption agreements and don’t need one at all. Check the official list on evisa.gov.vn before applying.
Validity period: A Vietnam e-Visa allows a stay of up to 90 days from your date of arrival, regardless of whether you choose single or multiple entry.
Single-entry vs multiple-entry: A single-entry e-Visa lets you enter Vietnam once and costs 25 USD. A multiple-entry e-Visa allows unlimited entries within the 90-day validity window and costs 50 USD. If your trip includes a side trip to Cambodia or Laos and back into Vietnam, get the multiple-entry version. It’s better value than applying twice.
Who can apply: Anyone applying from outside Vietnam. Applications submitted while you’re already inside the country are automatically rejected. Apply before you leave home.
What Documents Do You Need for a Vietnam e-Visa?
Passport validity: Your passport must be valid for at least 6 months beyond your arrival date. If it’s close to expiring, renew it before applying.
Passport photo: A recent portrait photo, 4×6 cm, white background, no glasses, no hat, taken within the last 6 months. Upload as a JPG file under 2MB.
Passport information page: A clear scan or photo of your passport’s bio data page. All details, your photo, name, passport number, must be fully visible and legible.
Travel details: Your intended port of entry and exit. Vietnam’s e-Visa is accepted at all international airports, land borders, and seaports, so choose whichever matches your actual itinerary.
Email address: A valid, active email address. This is where your approval, or any request for additional information, gets sent.
Payment method: A valid international credit or debit card. Payment is processed online at the time of application.
How to Apply for a Vietnam e-Visa
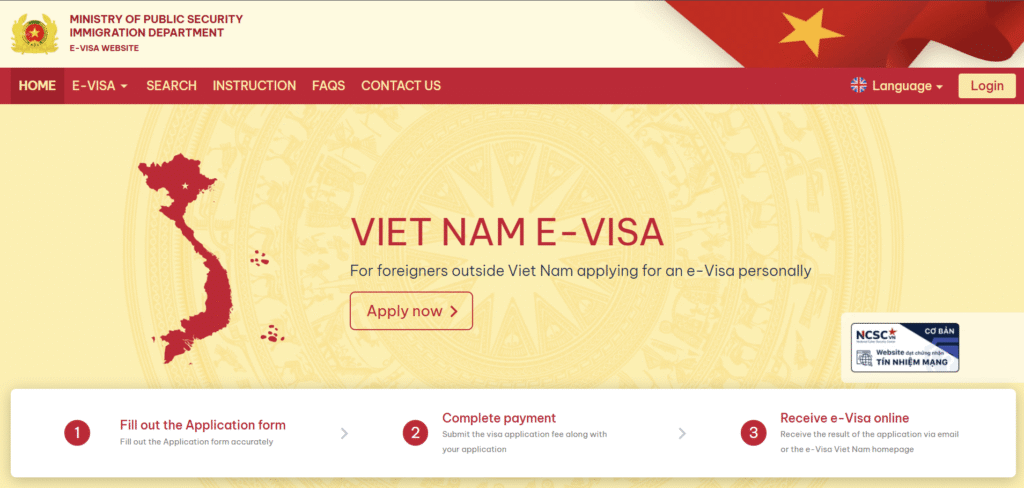
Visit the official website. Go to evisa.gov.vn. This is the only official government portal. Avoid lookalike sites that charge inflated service fees without telling you clearly.
Fill out the application. Select your nationality, intended port of entry, and complete your personal details, travel dates, and address in Vietnam.
Upload documents. Add your passport bio page scan and your passport-style photo, following the size and format requirements exactly.
Pay the visa fee. 25 USD for single-entry or 50 USD for multiple-entry, paid by card through the secure payment gateway.
Wait for processing. You’ll receive a registration code by email immediately after submission. Use it to check your status anytime at evisa.gov.vn/e-visa/search.
Download your approved e-Visa. Once your status shows “Granted visa,” download and print the PDF. You’ll need it alongside your passport at the port of entry.
Vietnam e-Visa Processing Time and Fees
Standard processing time: The official processing time is 3 working days from when your complete application and payment are received. In practice, most travelers report 3 to 5 working days, and this can stretch to 5 to 7 working days during busier periods.
Government fees: 25 USD for a single-entry e-Visa. 50 USD for a multiple-entry e-Visa. Both valid for up to 90 days. The fee is non-refundable, even if your application is rejected.
When to apply before your trip: Apply at least 2 weeks before departure. If you’re traveling during peak season, January to April or November to December, or close to a Vietnamese public holiday, apply 15 to 20 days ahead to build in a buffer for any delays.
Common Vietnam e-Visa Mistakes to Avoid
Uploading blurry passport photos: Low-resolution, poorly lit, or cropped photos are one of the most common reasons applications get delayed. Use a clear, properly framed image that meets the exact size and background requirements.
Incorrect passport number: A single mistyped digit can cause delays or outright rejection. Double-check this field against your physical passport before submitting.
Wrong arrival or departure dates: Your e-Visa validity is tied to the dates you enter. Make sure these match your actual flight or travel plans, not estimated guesses.
Choosing the wrong entry point: Select the airport, land border, or seaport that matches how you’re actually entering Vietnam. A mismatch can cause issues at immigration even if your visa is approved.
Waiting until the last minute to apply: The official portal cannot expedite processing. If you apply 2 days before your flight and something goes wrong, you have no buffer left to fix it.
What Happens After Your e-Visa Is Approved?
Download and print your e-Visa. Once your status shows “Granted visa,” download the PDF from the official portal and print a physical copy.
Save a digital copy. Keep a copy on your phone and in cloud storage as backup. Useful if you misplace the printed version or need to show it digitally.
What to show at immigration. Present your printed e-Visa alongside your physical passport at the port of entry. Immigration officers expect a printed copy, not just a screen.
Double-check all information. Before you travel, review your approved e-Visa for any errors in your name, passport number, or dates. Catching a mistake before you fly is far easier to fix than catching one at immigration.
My Experience Applying for a Vietnam e-Visa
I applied 10 days before my arrival in Vietnam. My e-Visa was approved in 6 days, which is on the longer end of the standard processing window but still left me with a few days of buffer before my flight.
The process itself was straightforward. The application form took about 15 minutes to complete. Uploading my passport photo and bio page scan was simple since I’d prepared both files in advance with the correct dimensions.
The one thing I’d do differently: apply earlier than 10 days out. Mine worked out fine, but if my application had landed during a busier processing period or needed any correction, I would have been cutting it close. Two weeks is a safer window than 10 days, even though 10 days technically worked for me.
My advice for first-time applicants: prepare your passport photo and bio page scan before you start the application. Having both files ready and correctly formatted before you open the website makes the entire process faster and reduces the chance of upload errors.
My Advice Before Applying for a Vietnam e-Visa
Apply a couple of weeks before departure. Not the standard 3 to 5 days the website advertises. Give yourself a real buffer.
Double-check every detail before submitting. Your name, passport number, and travel dates should match your physical passport exactly. This single habit prevents most delays.
Only use the official government website. evisa.gov.vn is the only site you need. Third-party services charge additional fees for the same process you can complete yourself in 15 minutes.
Keep both digital and printed copies of your e-Visa. Print one for immigration. Save a digital copy as backup in case anything happens to the printed version while traveling.
Conclusion
The Vietnam e-Visa process is simple when you take a few minutes to do it carefully. Prepare your documents correctly, double-check every detail before you submit, and apply with enough time to spare.
A few minutes spent reviewing your application can save days of unnecessary stress and let you start your Vietnam trip without worrying about whether your paperwork is in order.
Frequently Asked Questions About the Vietnam e-Visa
How long does a Vietnam e-Visa take?
The official processing time is 3 working days, though most applicants report 3 to 5 working days in practice. During peak season this can extend to 5 to 7 working days. Apply at least 2 weeks before your trip to build in a safe buffer.
Can I enter Vietnam more than once?
Yes, if you apply for the multiple-entry e-Visa at 50 USD. This allows unlimited entries within the 90-day validity period. A single-entry e-Visa at 25 USD only permits one entry.
Can I extend my Vietnam e-Visa?
No. Vietnam e-Visas cannot be extended once issued. If you want to stay longer than your approved duration, you need to exit the country and reapply for a new e-Visa from outside Vietnam.
What if my application is rejected?
The government fee is non-refundable, even if your application is rejected. You can reapply with corrected information. Most rejections happen because of mismatched passport details or low-quality photos, so review both carefully before resubmitting.
Do I need to print my e-Visa?
Yes. Immigration officers expect a printed copy alongside your passport at the port of entry. Keep a digital copy as backup, but don’t rely on showing it from your phone alone.
Planning Your Vietnam Trip?
If you’re building a bigger Vietnam itinerary, here’s what else I’ve written:
Vietnam Slow Travel Guide: 50-Day Itinerary & Budget (2026)
Vietnam Itinerary for Slow Travel: My 50-Day Route Through the Real Vietnam
Vietnam Travel Budget: Exactly How Much I Spent in 50 Days
Vietnam Sleeper Bus Tips 2026: Things I Wish I Knew Before My First Ride
